Batch Letter Options
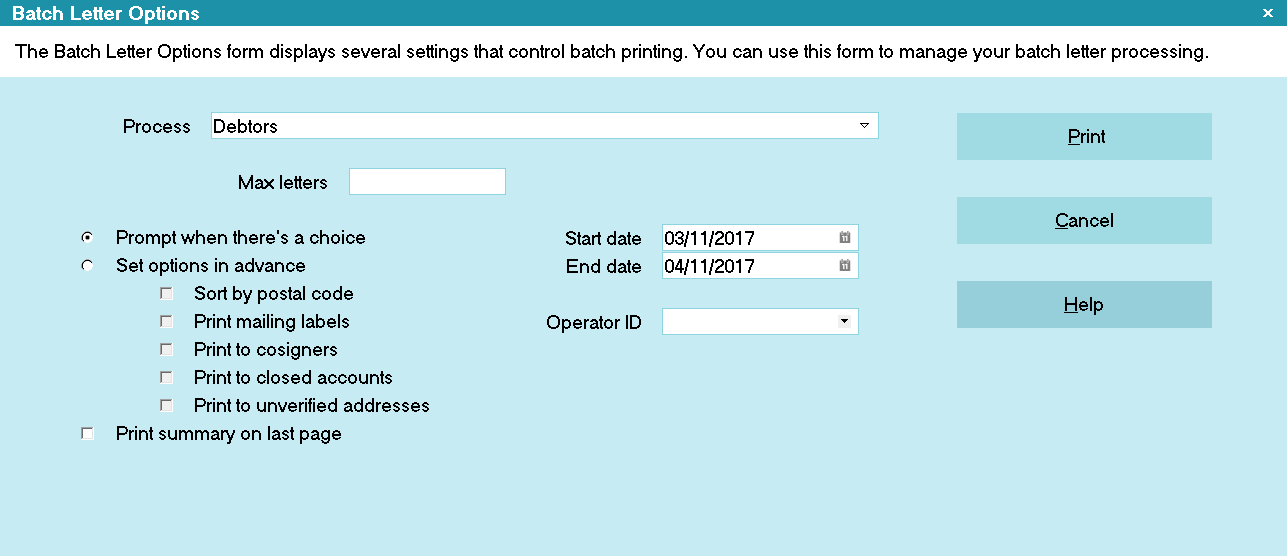
The Batch Letter Options form displays several settings
that control batch printing. You can use this form to
manage your batch letter processing. Settings give
you control over letters to include in this batch.
Select a date range, operator ID, or set other options
in advance.
Batch Letter Options
A few examples of how you can manage complex scenarios with Batch Letter Options:
- Assign letter printing to a specific Operator ID and
control the types of letters you print in a particular batch.
This lets you use different types of paper or letterhead for
certain types of letters or different letter series. This works
very well for printing checks.
- Sort your letters by Postal Code. This lets easily
prepare your mailings as you run your batch -- ready to
deliver to the Post Office.
 Batch Letters may also be scheduled using
Collect!'s Scheduler.
Batch Letters may also be scheduled using
Collect!'s Scheduler.
Process
Select either DEBTORS or CLIENTS from this pick list.
If you select DEBTORS, Collect! will process all debtor
letters that fit the criteria you select in the
Batch Letter Options. If you select CLIENTS, your
client letters will be processed using the criteria you
choose.
 This pick list is visible only when the
Client Management option is enabled in
Collect! Features. Otherwise, Collect! simply
processes your Debtor letter batch.
This pick list is visible only when the
Client Management option is enabled in
Collect! Features. Otherwise, Collect! simply
processes your Debtor letter batch.

Prompt When There's A Choice
Switch this ON with a dot in the radio button if you
want Collect! to prompt you whether or not to print
the particular letter. You will be prompted if Collect!
encounters a Closed account. You will be prompted
if Collect! finds a bad address about to be printed.
Please refer to Help topic, Address Not OK for
details.
Set Options In Advance
Switch this ON with a dot in the radio button to set your
own options for printing this batch. You can automate the
batch to run without interruption. This frees you to
perform other tasks, rather than minding any prompts that
may occur. Set up your batch process using the additional
options provided.
If this is switched OFF, Collect! will prompt
you whenever a decision is to be made
regarding printing to closed accounts, or
printing to a address not OK.
Sort By Postal Code
Switch this ON with a check mark to sort your letters by Postal
Code as they are printed. Letters must have valid Postal Codes.
Using Collect!'s special Barcode commands,
you can deliver to the Post Office, a
sorted mailing in Postal Code order,
complete with POSTNET barcodes.
Print Mailing Labels
Switch this ON with a check mark to print mailing labels.
Collect! will prepossess all contacts for debtors in this batch.
Labels are printed and then letters are printed.
Print To Cosigners
This switch applies only to the Letter Service module. If you
switch it ON with a check mark, letters for Letter Service will
be printed to Cosigners.
You can restrict printing to Cosigners if you
only want to include records with "Class" set
to "Cosigner." Please refer to Help topic,
Report and Printer Setup for details.
Print To Closed Accounts
Switch this ON with a check mark to automatically print to
Closed accounts without stopping to prompt you to do so.
Print To Unverified Addresses
This switch is used with the Letter Service module when
you want to request an NCOA check on account addresses.
Switch this ON to force Collect! to print a letter to a "bad"
address, which means the 'Address OK' switch is OFF in
the Debtor form.
Be sure to switch ON 'NCOA check' in the
Report Options for your Letter Service letter
templates when you want to Print To Unverified
Addresses.
When printing to any option other than Letter Service,
this switch has no effect. Collect! will warn you when
you are trying to print to a "bad" address. Then it
will pass over the account and write to the Application Log.
To see which records were skipped in your letter
batch and any explanations, select System from the
top menu bar, then select Diagnostics, Application Log.
You can select "Report" to view only report events.
Print Summary On Last Page
Select this with a check mark to print the letter batch
summary to the printer as the last page of your batch
printing. This option outputs to the printer the same
information that you see in the summary screen when
your letter batch has completed. Any letters skipped in
the batch are logged to Collect!'s Application Log.
If you have this option selected for running a batch of
letters to Letter Service, Collect will put the summary
information in a date and time-stamped file in the
Collect\Log Files folder.
Start Date
Select the small calendar icon to pop up a calendar.
Select a start date for contacts to include in this batch.
This is the Due Date of the letter contact.
End Date
Select the small calendar icon to pop up a calendar.
Select an end date for contacts to include in this batch.
This is the Due Date of the letter contact.
Max Letters
Enter a maximum number of letters to print in this
batch. Collect! will end the batch when this number
of letters has printed. You can mark the contacts as
Done to finish the printing process. Print any
remaining outstanding letters in a new batch, if needed.
Leave this field blank to print all scheduled letters
within the selected Date Range.
Operator ID
This option allows you great flexibility in managing your
letter batches. You can set up batch letter operators
and assign letter contacts to them. For instance, a
Letter 1 operator, LT1. Then put special paper in your
printer and print all the LT1 letter contacts in one single
batch.
If you leave this field blank, Collect! will process any Letter
contacts in progress for the selected date range.
Select the down arrow next to this field to pop up the list
of Operators in the system. Select a specific operator
whose letter contacts you want to include in this batch.
Help
Press this button to access help on the
Batch Letter Options form.
Cancel
Press this to ignore any changes you may have
made and return you to the previous form.
Print
Press this to continue with your Batch Letter
printing. You will be prompted to choose a
report output destination.
| 
Was this page helpful? Do you have any comments on this document? Can we make it better? If so how may we improve this page.
Please click this link to send us your comments: helpinfo@collect.org